
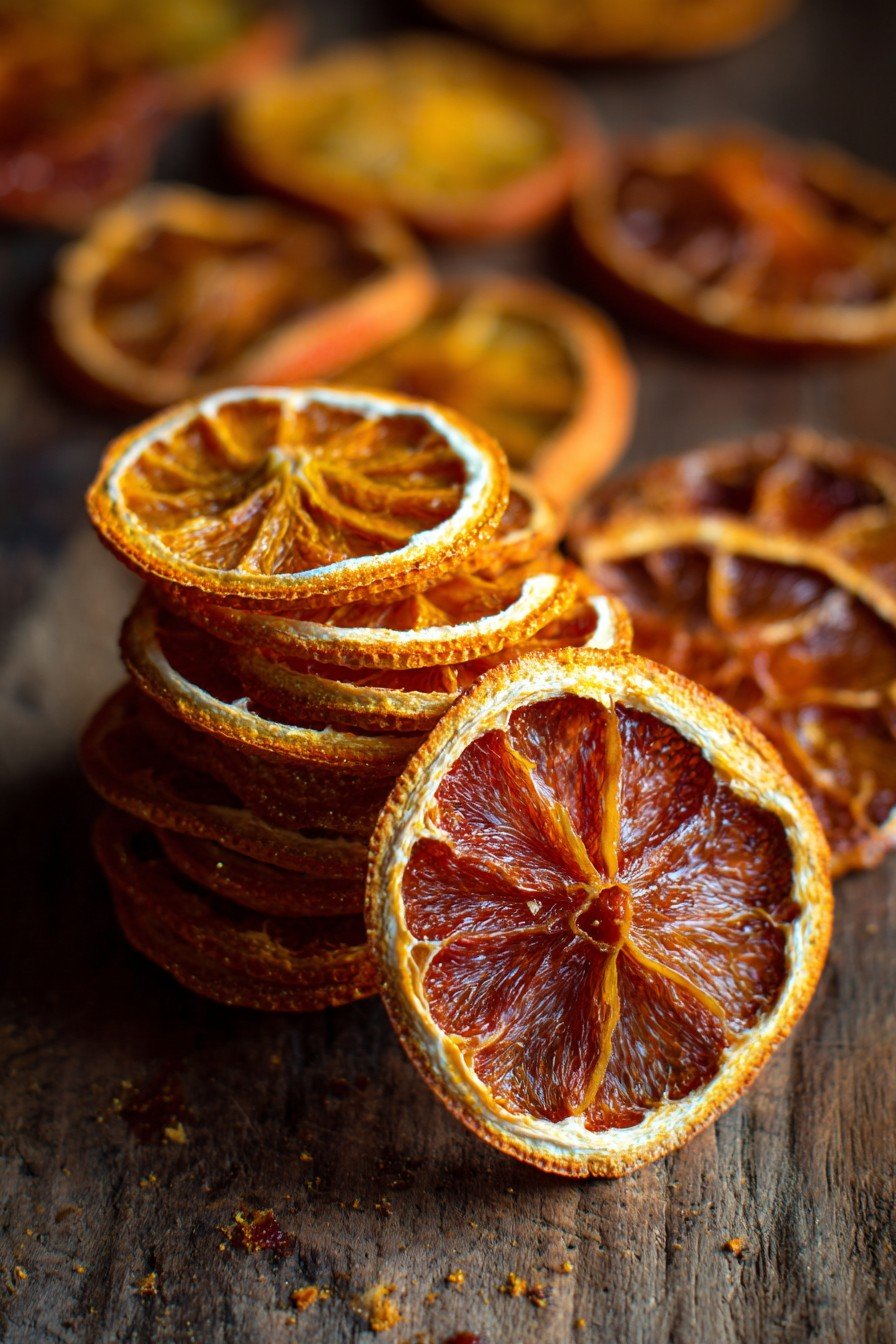
Hey y'all! If you've ever wanted a burst of sunshine for your holiday décor, baking projects, or a healthy snack, these Slow-Baked Gorgeous Dried Orange Slices for Best Color are here to wow you. Glowing with vibrant orange hues and subtle, sweet-tart flavor, these orange slices are the ultimate edible adornment for cocktails, cakes, or festive garlands. Simple to prepare but impressively beautiful—let's get cooking!
Why You'll Love This Slow-Baked Gorgeous Dried Orange Slices for Best Color Recipe
- Unbeatable color retention thanks to the slow-bake process—every slice is camera-ready!
- Versatile: perfect for gifts, snacking, garnishes, or as naturally beautiful décor.
- Wholesome, with just one ingredient and no added sugar or preservatives.
- Simple and budget-friendly—requires only oranges and basic kitchen tools.
- Your home will be filled with a delightfully fresh, citrusy aroma while these bake!
Ingredients for Slow-Baked Gorgeous Dried Orange Slices for Best Color
- 3 large navel oranges (seedless for best results)
- Optional: 1 tablespoon superfine sugar (for extra sparkle or if using for dessert garnish)
Directions: How to Make Slow-Baked Gorgeous Dried Orange Slices for Best Color
Step 1: Preheat and Prep
- Preheat your oven to 200°F (93°C). Line two large baking sheets with parchment paper.
- Wash the oranges thoroughly, removing any stickers or waxy residue. Pat dry.
Step 2: Slice the Oranges
- Using a very sharp, serrated knife or mandoline, slice the oranges crosswise into thin rounds, about ⅛-inch (3mm) thick. Aim for uniform slices for even drying and the best color.
Step 3: Arrange and Optional Sprinkle
- Lay the orange slices in a single layer on the prepared baking sheets, making sure they don’t overlap.
- If using, lightly sprinkle slices with superfine sugar for extra shine and sweetness.
Step 4: Slow-Bake for Gorgeous Color
- Bake at 200°F (93°C) for 2.5 to 3.5 hours, flipping the slices every hour for even drying and to achieve the best color.
- The slices are ready when they appear dry, slightly translucent, and no longer sticky to touch. (Time may vary based on slice thickness and oven.)
Step 5: Cool and Store
- Transfer the dried orange slices to a wire rack and let them cool completely—they will crisp up a bit as they cool.
Prep time: 15 minutes
Cook time: 2.5-3.5 hours
Total time: About 3.5-4 hours
Notes & Helpful Tips for Slow-Baked Gorgeous Dried Orange Slices for Best Color
- If you need more tips on slicing oranges safely and uniformly, check out this handy guide from Food Network.
- You can use blood oranges, Cara Cara, or mandarins for unique color variations. Just make sure slices aren’t too thick!
- Moisture is your enemy—always store slices only when fully dried, or check out Simply Recipes for extra drying tips.
Variations for Slow-Baked Dried Orange Slices
- Cinnamon & Clove: Add a sprinkle of ground cinnamon or a clove in the center of each slice for a holiday aroma.
- Mixed Citrus Medley: Mix oranges with lemon and lime slices for a colorful, tangy assortment.
- Chocolate-Dipped: Once dried and cooled, dip half of each slice in melted dark chocolate—perfect treat or gift!
Required Equipment
- Sharp serrated knife or mandoline slicer
- Cutting board
- Baking sheets
- Parchment paper
- Wire cooling rack
Storage Instructions for Slow-Baked Gorgeous Dried Orange Slices for Best Color
- Once completely cool and dry, store slices in an airtight container at room temperature.
- They keep bright and flavorful for 3-4 weeks—but often vanish much sooner!
- For longer storage, keep in a zip-top bag and refrigerate for up to 2 months; freeze for several months if you wish.
Suggested Pairings and How to Serve Slow-Baked Gorgeous Dried Orange Slices
- Use as a striking garnish for cocktails, hot teas, or mulled wine.
- Decorate cakes, cupcakes, or desserts—or dip in chocolate for a gourmet treat.
- Thread onto twine for edible garlands, or package for elegant homemade gifts.
Pro Tips for the Best Slow-Baked Gorgeous Dried Orange Slices for Best Color
- Pat slices dry with a paper towel before baking to speed up the process and intensify the color.
- Rotate baking sheets in your oven halfway through to avoid hot spots and ensure even drying. See more on oven best practices at Serious Eats.
- Check smaller or thinner slices early to avoid over-drying and browning—which can mute the gorgeous orange tone.
FAQ: Slow-Baked Gorgeous Dried Orange Slices for Best Color
- Can I use other citrus fruits besides navel oranges?
- Yes! Lemons, limes, blood oranges, or grapefruits all work—just expect subtle color and flavor differences.
- How do I prevent the slices from sticking while baking?
- Use parchment paper or a silicone baking mat, and flip slices every hour to avoid sticking and ensure even drying.
- Are dried orange slices safe to eat?
- Absolutely—these are a nutritious snack or garnish, packed with natural citrus flavor and no added sugar!
Ingredients
- 4 large oranges, washed
- 1 tablespoon lemon juice
- 2 tablespoons granulated sugar
- 1 teaspoon ground cinnamon
- ¼ teaspoon sea salt
- Parchment paper
- Nonstick spray or oil for greasing
- Optional: 1 teaspoon vanilla extract
Instructions
-
1Preheat the oven to 200°F (90°C) and line two large baking sheets with parchment paper. Lightly grease with nonstick spray or oil.
-
2Slice the oranges into ⅛-inch (3 mm) thin rounds using a sharp knife or mandoline, discarding any seeds.
-
3In a small bowl, mix lemon juice, granulated sugar, ground cinnamon, sea salt, and vanilla extract if using.
-
4Gently brush both sides of each orange slice with the lemon juice mixture and arrange in a single layer on the prepared baking sheets.
-
5Bake for 3 hours, flipping slices halfway through, until the oranges are dry to the touch and vibrant in color. Allow to cool completely before using.
Approximate Information for One Serving
Nutrition Disclaimers
Number of total servings shown is approximate. Actual number of servings will depend on your preferred portion sizes.
Nutritional values shown are general guidelines and reflect information for 1 serving using the ingredients listed, not including any optional ingredients. Actual macros may vary slightly depending on specific brands and types of ingredients used.
To determine the weight of one serving, prepare the recipe as instructed. Weigh the finished recipe, then divide the weight of the finished recipe (not including the weight of the container the food is in) by the desired number of servings. Result will be the weight of one serving.
Did you make this recipe?
Please consider Pinning it!!

Leave a Reply