
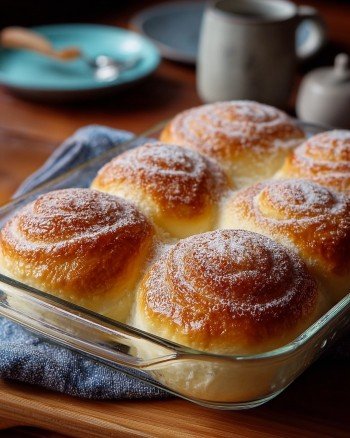
Hey y'all! Are you ready to bake something truly irresistible? Classic Ensaymada Bread is a Filipino bakery favorite, beloved for its super soft, pillowy crumb, golden buttery goodness, and sweet, cheesy topping. It’s perfect as a snack, a sweet breakfast, or even as a treat for special gatherings. If you’ve never tried making Ensaymada at home, you’re in for a real treat — let’s get cooking!
Why You'll Love This
- Super Soft & Fluffy: Every bite melts in your mouth with cloud-like softness.
- Delightfully Buttery: Infused with rich butter inside and out for extra flavor.
- Sweet & Savory Topping: The sugar-cheese combo on top is simply addictive.
- Perfect for Gifting: Pretty, portable, and always a crowd-pleaser.
- Easy to Customize: There are endless options for fillings and toppings!
Ingredients
- 3 cups all-purpose flour
- ¾ cup whole milk (warm, about 110°F)
- ¼ cup granulated sugar
- 2 ¼ teaspoon (1 packet) active dry yeast
- ¼ cup unsalted butter (softened)
- 2 large eggs (room temperature)
- ½ teaspoon salt
- 2 tablespoon powdered milk
For the topping:
- ¼ cup unsalted butter (softened, for brushing)
- ¼ cup granulated sugar
- ½ cup grated cheddar cheese (or Edam/Quezo de Bola preferred)
Directions
Prep Time: 20 minutes | Rising Time: 1 hour, 30 minutes | Bake Time: 18-20 minutes | Total Time: 2 hours, 20 minutes
1. Activate the Yeast
- In a small bowl, combine the warm milk, 1 tablespoon of the sugar, and the active dry yeast.
- Stir well and let sit for 5-10 minutes, until foamy.
2. Make the Dough
- In a large mixing bowl, whisk together the flour, remaining sugar, powdered milk, and salt.
- Add the eggs and yeast mixture. Mix until a shaggy dough forms.
- Add the softened butter and knead by hand or with a mixer (dough hook) for about 10 minutes until the dough is smooth and elastic.
3. First Rise
- Place the dough in a greased bowl. Cover with a cloth or plastic wrap and let rise in a warm place for 1 hour, or until doubled in size.
4. Shape the Ensaymada
- Gently punch down the dough and divide into 12 equal pieces.
- Roll each piece into a long rope and spiral shape, tucking the ends under to form a bun.
- Place each rolled dough in a greased muffin tin or ensaymada mold, or on a parchment-lined baking sheet.
5. Second Rise
- Cover and let rise again for 30-40 minutes, until puffy.
6. Bake
- Preheat oven to 350°F (175°C). Bake for 18-20 minutes, or until tops are lightly golden and buns sound hollow when tapped.
- Remove from oven and cool slightly on a wire rack.
7. Add the Classic Topping
- While buns are warm, brush generously with softened butter.
- Sprinkle with granulated sugar, then top with grated cheddar cheese.
Notes
- Make sure your milk is warm—not hot—to activate the yeast without killing it.
- Kneading for the full time gives the dough its signature fluffiness.
- Allow the buns to cool slightly before adding the topping to prevent melting the cheese.
Variations
- Ube Ensaymada: Add 2 tablespoons ube halaya (purple yam jam) to the dough for a colorful twist.
- Salted Egg Topping: Add crumbled salted eggs on top for a traditional Filipino flavor.
- Chocolate-filled Ensaymada: Wrap a square of chocolate inside each dough ball before rolling.
Required Equipment
- Large mixing bowl
- Measuring cups and spoons
- Stand mixer with dough hook (optional)
- Muffin tin or ensaymada molds
- Pastry brush
- Wire rack
Storage Instructions
Store leftover ensaymada in an airtight container at room temperature for up to 2 days, or refrigerate for up to 5 days. To enjoy, reheat in the microwave for 10-15 seconds until warm. For longer storage, freeze (without topping) for up to 2 months. Thaw, then add butter, sugar, and cheese before serving.
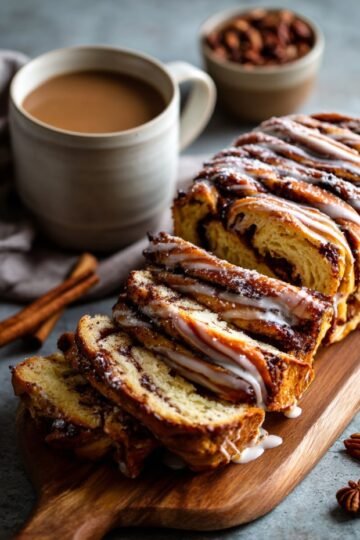
Suggested Pairings and Serving Recommendations
Serve freshly baked Classic Ensaymada Bread with a mug of hot chocolate, strong coffee, or warm tea. It also pairs beautifully with fresh fruit or as part of a festive brunch spread.
Pro Tips
- Weigh your flour for the best consistency and fluffiest crumb.
- Let your eggs and butter come to room temperature before baking for easier mixing.
- Use high-quality, sharp cheddar or aged Edam for maximum cheesy flavor.
FAQ
- Can I make ensaymada dough ahead of time?
- Yes! After the first rise, you can refrigerate the dough overnight. Let it come to room temperature, shape, rise again, and bake as usual.
- Why is my ensaymada not as fluffy?
- Underkneeading or using old yeast can result in dense bread. Knead until elastic, and always use fresh yeast for best results.
- Can I use instant yeast instead of active dry yeast?
- Absolutely! You can directly add instant yeast to the dry ingredients and skip the proofing step; then proceed as directed.
Ingredients
- 3 cups all-purpose flour
- ⅓ cup granulated sugar
- 2 ¼ teaspoon active dry yeast
- ½ cup whole milk, warm
- 2 large eggs
- ⅓ cup unsalted butter, softened
- ½ teaspoon salt
- ½ cup butter (for topping)
- ½ cup grated cheddar cheese (for topping)
- ¼ cup granulated sugar (for topping)
Instructions
-
1In a bowl, combine warm milk, 1 tablespoon sugar, and yeast. Let stand for 5-10 minutes until foamy.
-
2In a large mixing bowl, mix flour, remaining sugar, and salt. Add the yeast mixture, eggs, and softened butter. Knead until a soft, elastic dough forms.
-
3Cover the dough and let it rise in a warm place for 1 hour or until doubled in size.
-
4Punch down the dough and divide into 8 portions. Roll each piece into a log and coil into a spiral. Place on a baking tray, cover, and let rise for another 30 minutes.
-
5Bake in a preheated oven at 350°F (175°C) for 18-20 minutes or until golden brown. Let cool slightly.
-
6Brush each ensaymada with melted butter, sprinkle with sugar, and top with grated cheddar cheese before serving.
Approximate Information for One Serving
Nutrition Disclaimers
Number of total servings shown is approximate. Actual number of servings will depend on your preferred portion sizes.
Nutritional values shown are general guidelines and reflect information for 1 serving using the ingredients listed, not including any optional ingredients. Actual macros may vary slightly depending on specific brands and types of ingredients used.
To determine the weight of one serving, prepare the recipe as instructed. Weigh the finished recipe, then divide the weight of the finished recipe (not including the weight of the container the food is in) by the desired number of servings. Result will be the weight of one serving.
Did you make this recipe?
Please consider Pinning it!!

Leave a Reply