
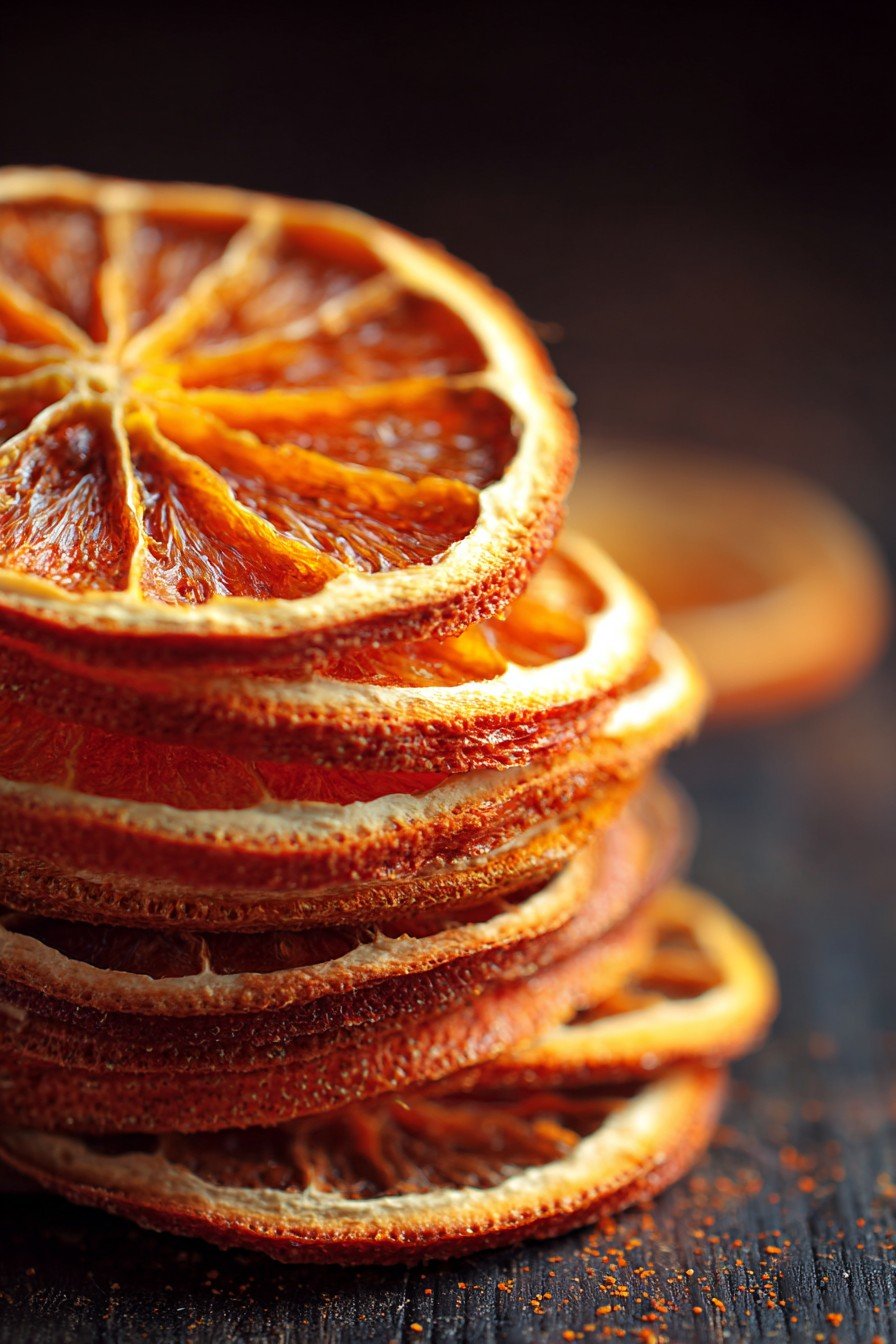
Hey y'all! Are you looking for an irresistible way to brighten up your kitchen, snacks, or homemade holiday gifts? These Classic Gorgeous Dried Orange Slices (Simple Oven Recipe) turn fresh oranges into beautiful, zesty, and ultra-versatile slices. Perfect for decorating your holiday table, adding flair to drinks, or wholesome snacking, this recipe is super easy and totally rewarding. Let's get cooking!
Why You'll Love This Classic Gorgeous Dried Orange Slices (Simple Oven Recipe)
- Bring vibrant color and citrus fragrance to your decor, drinks, or treats.
- Only two ingredients, super budget-friendly, and naturally gluten-free.
- Minimal prep with just a knife and parchment—no fancy tools required!
- Long shelf-life for homemade snacking, gifting, or last-minute party garnish.
- Perfect for holiday crafts, snacks, and even cocktail décor year-round.
Ingredients for Classic Gorgeous Dried Orange Slices (Simple Oven Recipe)
- 3 large navel oranges (or any seedless orange variety)
- 1 to 2 tablespoons granulated sugar (optional – for extra sweetness and shine)
Directions for Classic Gorgeous Dried Orange Slices (Simple Oven Recipe)
Prep Time: 10 minutes | Cook Time: 3 hours | Total Time: 3 hours 10 minutes
Step 1: Prep the Oranges
- Preheat your oven to 200°F (93°C). Line two large baking sheets with parchment paper.
- Wash and dry the oranges thoroughly, since you'll be leaving the peel on.
- Using a sharp serrated knife or mandoline, slice the oranges crosswise into ⅛-inch thick rounds. Try to keep slices as uniform as possible for even drying.
Step 2: Arrange and Sugar the Slices
- Lay the orange slices in a single layer on the prepared baking sheets, making sure they don’t overlap.
- Optional: Sprinkle a light dusting of sugar over the slices for added gloss and sweetness.
Step 3: Bake Low and Slow
- Bake for 2.5 to 3 hours, turning slices every hour. Watch closely toward the end and remove any slices that turn dark or dry out faster.
- The orange slices are done when they are dry to the touch but still slightly pliable in the center.
Step 4: Cool and Store
- Let the slices cool on a wire rack. They will crisp up a bit more as they cool.
Notes for Classic Gorgeous Dried Orange Slices (Simple Oven Recipe)
- Uniform slicing is key to even drying – a mandoline slicer can really help. Check out this mandoline guide by Bon Appétit.
- Don’t rush the process: low and slow baking prevents bitter, burnt edges.
- Check your oven temperature with an oven thermometer for best results. Learn more about using oven thermometers here.
Variations for Classic Gorgeous Dried Orange Slices (Simple Oven Recipe)
- Try lemon, lime, or blood orange slices for a colorful citrus combo.
- Sprinkle a touch of cinnamon or cardamom on the slices before baking for a warming twist.
- Dip the dried slices in melted dark chocolate for an elegant treat.
Required Equipment for Classic Gorgeous Dried Orange Slices (Simple Oven Recipe)
- Serrated knife or mandoline slicer
- Cutting board
- Baking sheets
- Parchment paper
- Wire rack
- Oven
Storage Instructions for Classic Gorgeous Dried Orange Slices (Simple Oven Recipe)
Store completely cooled dried orange slices in an airtight container at room temperature for up to 1 month. For longer storage, keep in the refrigerator, where they’ll last up to 3 months. Humidity can affect crispness, so for extra crunch, slip in a small food-safe silica gel packet.
Suggested Pairings & Serving Recommendations
- Float on top of spiced cocktails, teas, or sparkling water for a fragrant garnish.
- Use as show-stopping toppers on cakes, tarts, or yogurt bowls.
- String them into gorgeous garlands for festive holiday decor.
- Bundle in jars for unique, homemade edible gifts.
Pro Tips for Classic Gorgeous Dried Orange Slices (Simple Oven Recipe)
- For extra clear, jewel-like slices, blot excess juice from each slice before baking.
- If your oven runs unevenly, rotate baking sheets halfway through to ensure even drying – learn why from Serious Eats.
- Make a double batch—they disappear fast and are amazing for crafts and snacking alike!
FAQ: Classic Gorgeous Dried Orange Slices (Simple Oven Recipe)
- Can I make dried orange slices in a dehydrator instead?
- Absolutely! Lay the slices on dehydrator trays and dry at 135°F (57°C) for 6–8 hours, checking for dryness every couple hours.
- Do I need to remove the seeds from the oranges?
- Seedless oranges are best, but if you spot seeds, just pop them out after slicing for a prettier finished product.
- Can I use sugar substitutes or skip the sugar?
- Yes! The sugar is totally optional and mainly adds gloss and a hint of sweetness—it's delicious either way.
Ingredients
- 3 large oranges (seedless, navel or Valencia)
- 2 tablespoons granulated sugar (optional)
- 1 teaspoon ground cinnamon (optional)
- 1 teaspoon vanilla extract (optional)
- Non-stick cooking spray or parchment paper
- Pinch of sea salt (optional)
Instructions
-
1Preheat your oven to 200°F (93°C) and line two baking sheets with parchment paper or lightly spray with non-stick cooking spray.
-
2Wash and dry the oranges thoroughly. Cut them crosswise into thin, even slices—about ⅛ inch thick. Remove any seeds.
-
3Optionally, mix granulated sugar and cinnamon in a small bowl. Lightly brush orange slices with vanilla extract and sprinkle with the sugar-cinnamon mixture and a pinch of sea salt for extra flavor.
-
4Arrange the orange slices in a single layer on the prepared baking sheets. Make sure they do not overlap.
-
5Bake on the middle rack for 3 hours, turning slices every hour, until the oranges are dry with slightly chewy centers.
-
6Remove from the oven and let cool completely. Store in an airtight container; use as decoration, a snack, or a drink garnish.
Approximate Information for One Serving
Nutrition Disclaimers
Number of total servings shown is approximate. Actual number of servings will depend on your preferred portion sizes.
Nutritional values shown are general guidelines and reflect information for 1 serving using the ingredients listed, not including any optional ingredients. Actual macros may vary slightly depending on specific brands and types of ingredients used.
To determine the weight of one serving, prepare the recipe as instructed. Weigh the finished recipe, then divide the weight of the finished recipe (not including the weight of the container the food is in) by the desired number of servings. Result will be the weight of one serving.
Did you make this recipe?
Please consider Pinning it!!


Leave a Reply