
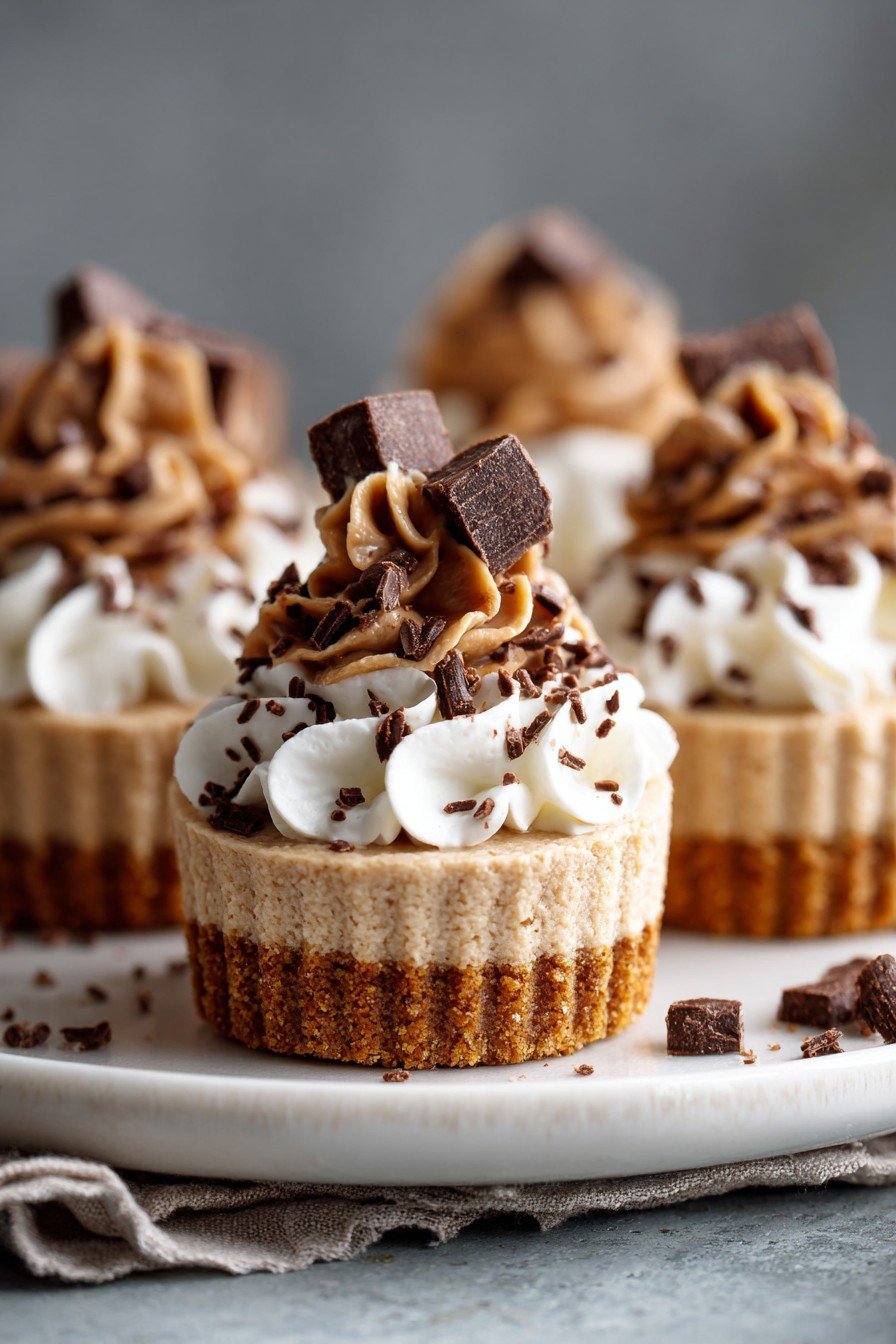
Hey y'all! If you adore fluffy, creamy desserts packed with peanut butter goodness, you're going to fall in love with this Mini peanut butter Pies Recipe. These cute, indulgent pies are a dream for peanut butter lovers—a perfect blend of salty-sweet flavor in a buttery graham cracker crust! Serve them at parties, holidays, or whenever you’ve got a sweet tooth and want a no-bake, make-ahead showstopper. Let’s get cooking!
Why You'll Love This
- No-bake recipe: quick and easy without turning on the oven.
- Creamy, luscious peanut butter filling that melts in your mouth.
- Perfect mini portions for sharing (or not!).
- Make ahead friendly—great for parties and gatherings.
- Customizable with your favorite toppings and mix-ins.
Ingredients
- 1 ¼ cups graham cracker crumbs
- ¼ cup granulated sugar
- 6 tablespoons unsalted butter, melted
- ¾ cup creamy peanut butter
- 4 ounces cream cheese, softened
- ½ cup powdered sugar
- 1 teaspoon vanilla extract
- 1 cup heavy whipping cream, cold
- ¼ cup chocolate chips, for topping (optional)
- Crushed peanuts, for garnish (optional)
Directions
Step 1: Prepare the Mini Pie Crusts
- Line a muffin tin with 12 paper liners.
- In a medium bowl, mix together the graham cracker crumbs, granulated sugar, and melted butter until the texture resembles wet sand.
- Divide the mixture evenly among the liners (about 1 ½ tablespoons per cup), pressing firmly with the back of a spoon to form the crusts.
Step 2: Make the Peanut Butter Filling
- In a large bowl, beat together the creamy peanut butter, softened cream cheese, powdered sugar, and vanilla extract with an electric mixer until smooth and fluffy.
Step 3: Whip the Cream and Fold In
- In a separate bowl, whip the heavy whipping cream until stiff peaks form.
- Gently fold the whipped cream into the peanut butter mixture until fully combined and no streaks remain.
Step 4: Assemble the Mini Pies
- Spoon or pipe the peanut butter filling evenly into the prepared crusts.
- Smooth the tops and garnish with chocolate chips and crushed peanuts if desired.
Step 5: Chill and Serve
- Refrigerate the mini pies for at least 2 hours or until set before serving — the longer they chill, the creamier they get!
Notes
- Use room temperature cream cheese for the smoothest filling.
- To make crusts extra firm, freeze for 15 minutes before adding the filling.
- The pies hold their shape best when served chilled.
Variations
- Chocolate Lovers: Use chocolate cookie crumbs instead of graham crackers for the crust.
- Nutty Twist: Add crushed pretzels or toffee pieces on top for extra crunch.
- Fruit Topping: Top with fresh sliced bananas or strawberries for a fruity finish.
Required Equipment
- 12-cup muffin tin
- Paper muffin liners
- Mixing bowls
- Hand or stand mixer
- Spatula
- Spoon (for crust)
- Piping bag (optional, for neat filling)
Storage Instructions
- Refrigerate mini peanut butter pies in an airtight container for up to 4 days.
- To freeze, place pies (without garnish) in a single layer, freeze solid, then transfer to a zip-top bag; thaw overnight in the refrigerator before serving.
- Always chill leftovers promptly for best texture and safety.
Suggested Pairings & Serving Recommendations
- Serve with a tall glass of cold milk or a cup of strong coffee for a classic combo.
- Add a dollop of whipped cream or drizzle of chocolate syrup for extra indulgence.
- Pair with fresh berries or vanilla ice cream for a sweet, refreshing contrast.
Pro Tips
- For ultra-creamy filling, don’t overmix the whipped cream into the peanut butter base.
- Use a piping bag for picture-perfect pies every time.
- Chill your bowl and beaters before whipping the cream for maximum volume and stability.
FAQ
Can I use crunchy peanut butter instead of creamy?
Absolutely! Crunchy peanut butter will add a delightful texture and extra peanutty bites to your pies.
Can I make these pies ahead of time?
Yes! These pies can be made up to 2 days in advance and stored in the refrigerator until you’re ready to serve.
Do I have to use muffin liners?
Muffin liners make for easy removal and serving, but you can also use silicone muffin cups or lightly grease the tin for a liner-free version.
Prep Time: 20 minutes | Total Time: 2 hours 20 minutes (including chilling)
Ingredients
- 1 ¼ cups graham cracker crumbs
- ¼ cup granulated sugar
- 6 tablespoons unsalted butter, melted
- ¾ cup creamy peanut butter
- 4 ounces cream cheese, softened
- ½ cup powdered sugar
- 1 teaspoon vanilla extract
- 1 cup heavy whipping cream, cold
- ¼ cup chocolate chips, for topping (optional)
- Crushed peanuts, for garnish (optional)
Instructions
-
1Line a muffin tin with 12 paper liners.
-
2In a medium bowl, mix together the graham cracker crumbs, granulated sugar, and melted butter until the texture resembles wet sand.
-
3Divide the mixture evenly among the liners (about 1 ½ tablespoons per cup), pressing firmly with the back of a spoon to form the crusts.
-
4In a large bowl, beat together the creamy peanut butter, softened cream cheese, powdered sugar, and vanilla extract with an electric mixer until smooth and fluffy.
-
5In a separate bowl, whip the heavy whipping cream until stiff peaks form.
-
6Gently fold the whipped cream into the peanut butter mixture until fully combined and no streaks remain.
-
7Spoon or pipe the peanut butter filling evenly into the prepared crusts.
-
8Smooth the tops and garnish with chocolate chips and crushed peanuts if desired.
-
9Refrigerate the mini pies for at least 2 hours or until set before serving — the longer they chill, the creamier they get!
Approximate Information for One Serving
Nutrition Disclaimers
Number of total servings shown is approximate. Actual number of servings will depend on your preferred portion sizes.
Nutritional values shown are general guidelines and reflect information for 1 serving using the ingredients listed, not including any optional ingredients. Actual macros may vary slightly depending on specific brands and types of ingredients used.
To determine the weight of one serving, prepare the recipe as instructed. Weigh the finished recipe, then divide the weight of the finished recipe (not including the weight of the container the food is in) by the desired number of servings. Result will be the weight of one serving.
Did you make this recipe?
Please consider Pinning it!
Leave a Reply