
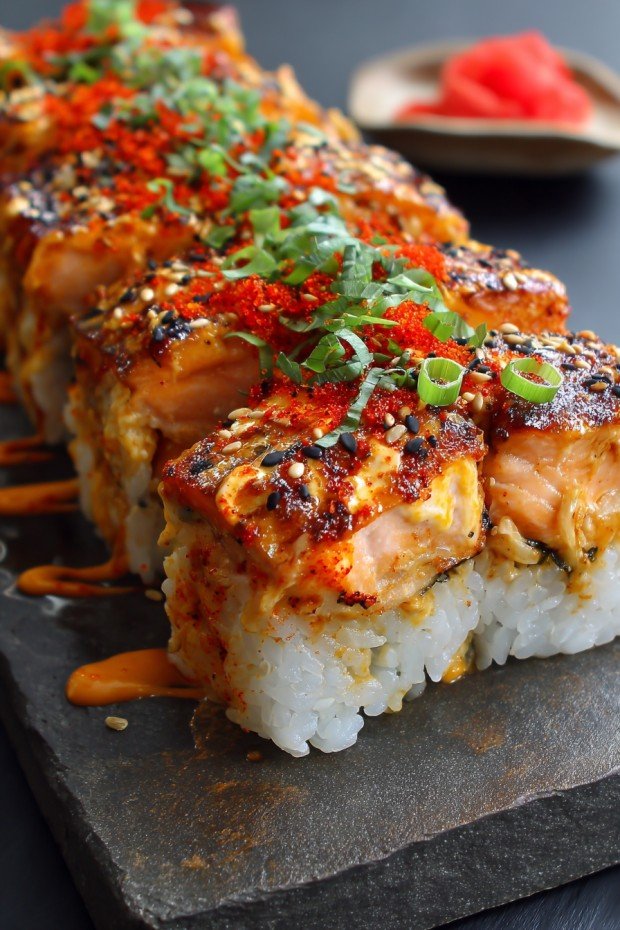
Hey y'all! If you're craving all the flavors of your favorite sushi roll—creamy, spicy, and savory—without the fuss of rolling, this Spicy Salmon Sushi Bake Recipe is a must-try. It’s perfect for potlucks, family dinners, or cozy nights at home, and you won’t believe how easy it is to make! Imagine tender, spicy salmon atop seasoned sushi rice, baked to perfection for a creamy, crave-worthy casserole. Let’s get cooking!
Why You'll Love This
- All the delicious sushi flavors, no rolling required!
- Creamy, spicy, and satisfying comfort food that's perfect for sharing.
- Versatile for weeknights, parties, and meal prep.
- Easy to customize with your favorite toppings and proteins.
- Ready in just about 35 minutes start-to-finish!
Ingredients
- 2 cups cooked sushi rice
- 2 tablespoon rice vinegar
- 1 tablespoon sugar
- ½ teaspoon salt
- 12 oz cooked or canned salmon, flaked
- ½ cup Kewpie mayonnaise (or regular mayo)
- 2 ½ tablespoon sriracha (plus extra for drizzling)
- 1 tablespoon soy sauce
- 2 teaspoon sesame oil
- 1 ½ tablespoon furikake seasoning
- 2 scallions, thinly sliced
- 1 ripe avocado, diced
- ½ English cucumber, diced
- Roasted seaweed snack sheets (nori), for serving
Directions
1. Prep the Oven & Dish
Preheat your oven to 400°F (200°C). Lightly grease an 8x8-inch baking dish or similar-sized casserole.
2. Season the Rice
In a small bowl, combine the rice vinegar, sugar, and salt. Microwave for 30 seconds or until the sugar dissolves. Pour this mixture over the freshly cooked sushi rice and gently fold it in to season.
3. Build the Base Layer
Spread the seasoned rice evenly into the bottom of your prepared baking dish. Sprinkle 1 tablespoon of furikake over the rice.
4. Make the Spicy Salmon Mixture
In a medium bowl, mix together flaked salmon, mayonnaise, sriracha, soy sauce, and sesame oil until well combined and creamy.
5. Layer and Bake
Spread the spicy salmon mixture evenly over the rice layer. Sprinkle remaining ½ tablespoon of furikake on top.
Bake for 15-18 minutes, until the top is slightly golden and bubbly.
6. Top and Serve
Remove from the oven and let cool for 5 minutes. Top with diced avocado, cucumber, and sliced scallions.
Drizzle with extra sriracha if you like it hot, and serve with roasted seaweed snack sheets for scooping!
Notes
- For extra flavor, use freshly cooked salmon instead of canned.
- If you prefer milder heat, reduce the sriracha to taste.
- Kewpie mayo gives a richer flavor, but any mayo works in a pinch.
Variations
- Crab Sushi Bake: Swap salmon for imitation crab or real crab meat.
- Vegetarian Sushi Bake: Use roasted mushrooms and zucchini instead of salmon.
- Spicy Tuna Sushi Bake: Substitute salmon with canned or cooked tuna.
Required Equipment
- 8x8-inch baking dish
- Mixing bowls
- Rice cooker or saucepan
- Microwave-safe bowl
- Spatula or spoon
Storage Instructions
Let the sushi bake cool completely before covering tightly and refrigerating. It will keep well for up to 3 days. Reheat individual portions in the microwave or oven until warmed through for best results.
Suggested Pairings & Serving Recommendations
- Serve with a light miso soup and a crisp cucumber salad for a fresh meal.
- Offer extra nori sheets for scooping, sushi-style!
- Sake, green tea, or a crisp lager pairs deliciously alongside this spicy bake.
Pro Tips
- Wet your hands before handling cooked sushi rice to prevent sticking.
- Make the sushi rice ahead of time to speed things up on busy nights.
- For added crunch, top with crispy fried onions or panko before baking.
FAQ
- Can I use raw salmon? For food safety, this recipe is designed for cooked salmon—if you use raw, ensure it’s sushi-grade and bake thoroughly.
- Can I make this ahead? Yes! Assemble up to a day ahead, then bake just before serving. Add fresh toppings after reheating.
- Is this recipe gluten-free? It can be! Use tamari instead of soy sauce and check that your furikake is gluten-free.
Prep Time: 15 minutes
Cook Time: 18 minutes
Total Time: 33 minutes
Yield: Serves 4
Ingredients
- 2 cups cooked sushi rice
- 2 tablespoon rice vinegar
- 1 tablespoon sugar
- ½ teaspoon salt
- 12 oz cooked or canned salmon, flaked
- ½ cup Kewpie mayonnaise (or regular mayo)
- 2 ½ tablespoon sriracha (plus extra for drizzling)
- 1 tablespoon soy sauce
- 2 teaspoon sesame oil
- 1 ½ tablespoon furikake seasoning
- 2 scallions, thinly sliced
- 1 ripe avocado, diced
- ½ English cucumber, diced
- Roasted seaweed snack sheets (nori), for serving
Instructions
-
1Preheat your oven to 400°F (200°C). Lightly grease an 8x8-inch baking dish or similar-sized casserole.
-
2In a small bowl, combine the rice vinegar, sugar, and salt. Microwave for 30 seconds or until the sugar dissolves. Pour this mixture over the freshly cooked sushi rice and gently fold it in to season.
-
3Spread the seasoned rice evenly into the bottom of your prepared baking dish. Sprinkle 1 tablespoon of furikake over the rice.
-
4In a medium bowl, mix together flaked salmon, mayonnaise, sriracha, soy sauce, and sesame oil until well combined and creamy.
-
5Spread the spicy salmon mixture evenly over the rice layer. Sprinkle remaining ½ tablespoon of furikake on top.
-
6Bake for 15-18 minutes, until the top is slightly golden and bubbly.
-
7Remove from the oven and let cool for 5 minutes. Top with diced avocado, cucumber, and sliced scallions.
-
8Drizzle with extra sriracha if you like it hot, and serve with roasted seaweed snack sheets for scooping!
Approximate Information for One Serving
Nutrition Disclaimers
Number of total servings shown is approximate. Actual number of servings will depend on your preferred portion sizes.
Nutritional values shown are general guidelines and reflect information for 1 serving using the ingredients listed, not including any optional ingredients. Actual macros may vary slightly depending on specific brands and types of ingredients used.
To determine the weight of one serving, prepare the recipe as instructed. Weigh the finished recipe, then divide the weight of the finished recipe (not including the weight of the container the food is in) by the desired number of servings. Result will be the weight of one serving.
Did you make this recipe?
Please consider Pinning it!


Leave a Reply